Gazelle Security Suite
Overview
The Gazelle Security Suite (GSS) gathers several tools dedicated to the testing of the ATNA profile. It embeds several modes:
- The ATNA Questionnaire.
- A Public Key Infrastructure to share trusted certificates and associated key pairs for testing purpose.
- A TLS simulator that will simulate clients and servers that can establish secured connection with your system under test (SUT), especially for ATNA profile.
- An Audit message Validation to edit Audit message specification.
- The Syslog Collector to validate SYSLOG protocol implementation
This user manual covers each mode.
Log in
In mostly case, you will have to be logged in to perform actions in GSS. To do so, click on the ** Login** button (top right), and input your testing session credentials.
GSS can be linked to several user databases. Whether so, there will be several login buttons. Choose the button with the title that matches the location where you are registered.
ATNA questionnaire
Purpose of the ATNA Questionnaire
The purpose of the ATNA questionnaire is to collect information regarding the implementation of the ATNA requirements in a test system.
Each test system that supports the ATNA Secure Node or Secure Application actor is required to complete an ATNA questionnaire; this is the test named pre-Connectathon test 11106. Your completed questionnaire will help the testing team understand your system’s capabilities, and it will direct their evaluation of your system during the test session.
How to access the ATNA Questionnaire (for connectathon participants)
The ATNA questionnaire resides in GSS, go to Audit Trail > ATNA Questionnaires.
For instructions on completing the questionnaire, see pre-Connectathon test 11106.
It is important to note that the ATNA Questionnaire build the list of inbound/outbound connections available for your system at its creation and based on your system registration information in Gazelle Test Management. If you modify the AIPOs of your system in TM afterwards, ATNA Questionnaire will no longer be valid. You will have to delete your questionnaire and recreate a new one.
PKI : Public Key Infrastructure
Gazelle platform offers its own public key infrastructure: Gazelle PKI. The main use case of this component of GSS is the delivery of signed certificates (and its associated key pair) to all registered participant for a testing session. All theses certificates are issued by a common certification authority (CA), and participant will just have to add this CA to their trust-store. It is the easier way to set up a trusted cluster dedicated to secured connection testing. Out of this cluster, certificates have no value. Also, PKI provide certificates to the TLS simulator that can be used in any other testing purpose. Finally, PKI comes with a certificate validator accessible through the user interface and through a Web Service.
-
In the case of the European connectathon, generated certificates are signed by the IHE Europe certification authority.
-
In the case of the Conformity Assessment sessions, generated certificates are signed by a dedicated certification authority (IHE-EUROPE-CATS; conformity-assessment-testing.ihe-europe.net).
Certificate request
Users can request a certificate for testing :
- Once logged, go to PKI > Request a certificate
-
Fill out the form, following fields are required to be provided :
- Certificate type : Client and Server
- the country (from the drop-down list)
- the organization
- the common name (system keyword is OK)
-
We recently add a new field in the forms, “Subject Alternative Names”, it’s an optional field. He can be input, with a DNS list separated by a comma : *.example.com, *.example2.com, …
- Finally, hit the Request button.
Then tool administrators are informed and will process it shortly. To retrieve your request and check its status, go to PKI > List Certificate requests.
If the request is accepted, the certificate will be generated and signed by the certificate authority of the tool. Finally a notification will be sent to your profile in Gazelle Test Management. You will be able to find the certificate in the list of all certificates PKI > List Certificates, or associated with the request in the list of all requests PKI > List certificate requests.
Depending of the configuration of the tool, certificates can also be immediately signed without administration review. Whether it’s the case, you will be redirected to the newly created certificate.
Certificates can be downloaded in various format: PEM and DER. The key pair (private and public) of the certificate you have request for is also available in PEM.
Note that you can also generate a keystore in p12 and JKS (java keystore) formats.
Certificate Validator
Gazelle PKI tool also embeds a certificate validator. You can thus check the conformity of your certificates against several profiles.
-
Go to PKI > Certificate validation
-
Load the certificate in PEM/CRT format
-
Then select a context and a validator
Each available validator uses the basic certificate validator first and then validate the certificate against specific rules.
-
Revocation can also be verified.
-
Click on Validate to execute the validation.
The result will be displayed on the page. Gazelle Security Suite does not store any validation result.
Certificate validation can also be used from EVSClient (https://gazelle.ihe.net/EVSClient/). Certificate validators are filtered by context and are dispatch over the menu. The advandage of using EVSClient is the generation of a validation report and its permanent storage.
Request a certificate for Gazelle Single-Sign on service
Gazelle platform has a single-sign on service in order to prevent the user to create a new login in each of the tools offered by the testbed. Read more about this service at : https://gazelle.ihe.net/content/gazelle-single-sign-authentication-users
In each of the tools offered by Gazelle platform, when you use the CAS login link, you are asked to provide your Gazelle TM credentials. In order to bypass the entering of your credentials, you can, in some Internet browser, import a certificate which will be used to silently authenticate yourself.
To generate this certificate, go to PKI > Install browser certificate for CAS auto-login. Also read https://gazelle.ihe.net/content/cas-autologin
SSL / TLS Simulators
The TLS mode gathers two functionalities: the simulators and the connection testing. While simulators can be used to perform exploratory testing, the connection testing provides a more rigorous environment where test cases are defined and expect specifics results.
Simulators
The simulator is used to effectively test the establishment of a secured connection. It can simulate both side of a connection: client or server. And those simulators are fully tunable by the administrator of the tool. Here is some example of parameters:
- supported protocols
- supported ciphersuites
- Client side authentication required or not.
- Certificate used
- Trusted certificate authorities
- Revocation checking
Once the simulators are set up, they can be used by any logged user for testing. Running a client is equivalent to send a secured small message on a target, while server is a listening channel for connection attempts.
The TLS simulator relies on a dedicated instance of the Gazelle Proxy to intercept messages. It offers a shortcut to validate the message content with EVSClient tool.
Each time a connection attempt is done, whatever the client side or server side it is, a secured connection summary is recorded and is added to the connection list. It informs users about the result of the security negotiation (also called handshake). A blue circle indicates the negotiation has succeeded, and a red circle the negotiation has failed. Details on this connection can be displayed for a better understanding.
Using clients simulators
To initiate a secured connection with a system under test acting as server, simulated clients can be used. Go to SSL / TLS > Simulators > Clients. You will see the list of all available clients. Chose one of them and click on Start a test. On this new page all TLS parameters for this simulator will be sum up. Verify it address your needs. Simulated client are not dependent on the application message, so you can select the desired kind of message to send. Here is the list of supported application protocol:
- DICOM_ECHO
- HL7
- WEBSERVICE
- SYSLOG
- RAW
Finally input the targeted host and port of your SUT and click on Start client. The connection attempt will be recorded and displayed below the Start client button.
Sometimes connections take a bit more time than expected and are not immediately displayed. In this case, try to refresh the page.
Using server simulators
Server simulators are permanently listening. To test your SUT acting as a client, you just have to choose one of the available and running servers in the list SSL / TLS > Simulators > Servers, note its IPaddress (or host) and port and send a message to it with your system. Connections will be recorded, go to Access logs or in the View page to list them.
In fact, server simulators are just channels that forward the message to a real server. If an answer is expected to your message, pay attention to select a server that forwards to a system that can effectively understand the content of your message. It is usually indicated in the keyword of the simulator.
Sometimes connections take a bit more time than expected and are not immediately displayed. In this case, try to refresh the page.
Secured connection testing
Since EU-CAT 2015, a set of test scenario has been set up to increase the TLS negotiation testing part. There are two goals:
- Make easier the graduation of the Authentication testing for the monitors
- Perform error case scenarios to stress the system under test and get a better trust level.
For now, only the systems acting as responder (servers) can run these scenarios.
Test cases overview
go to SSL / TLS > Testing > Test Cases. You will see the list of available test cases. For each test, a short description presents the goal of the scenario. In the detailed view, all the parameters that will be used during the test and its expected result are summarized.
At the bottom of the page, all the test instances are recorded. You can apply filters on the list to help you to find your results. To view the detail of a test run, click on the magnifying glass.
Run a test
To run a test, you must previously add the IHE Europe CA certificate to your trust-store.
Click on the Run button of the test of your choice. The TLS negotiation tests are not dependent on the application message, so you can select the desired kind of message to send. Here is the list of supported application protocol:
- DICOM_ECHO
- HL7
- WEBSERVICE
- SYSLOG
- RAW
Finally input the targeted host and port of your SUT and click on Run the test. The test instance will be recorded and displayed below.
Sometimes, the TLS Simulator is not initiated and the test instance is marked “NO RUN”. In this case, re-launch the test.
Understand the verdict
The verdict of a test is determined according to 3 sub-verdicts: the handshake verdict, the alert level verdict, and the alert description verdict. Some of these sub-verdicts can be declared as optional while the others are required. To be PASSED, a test must have all its required verdicts to PASSED.
An optional element will not be taken into account to calculate the final test verdict and you can consider this element as a warning. Here is an example, where the alert received was a ‘certificate unknown’:

In error test cases, the Handshake is usually expected to be FAILED. However it is not the only requirement! The simulator expects to receive a fatal/warning alert or a close_notify from the targeted system. If the connection is closed without receiving those alert messages, the Handshake verdict will be failed. For more information about ending a TLS negotiation and error alerts, see RFC 2246 section 7.2.
Audit message Validation
Audit message specifications created on Gazelle Security Suite are used in EVSClient to validate Audit messages.
To create or to edit Audit message specification, go to Audit Trail > Audit message administration.
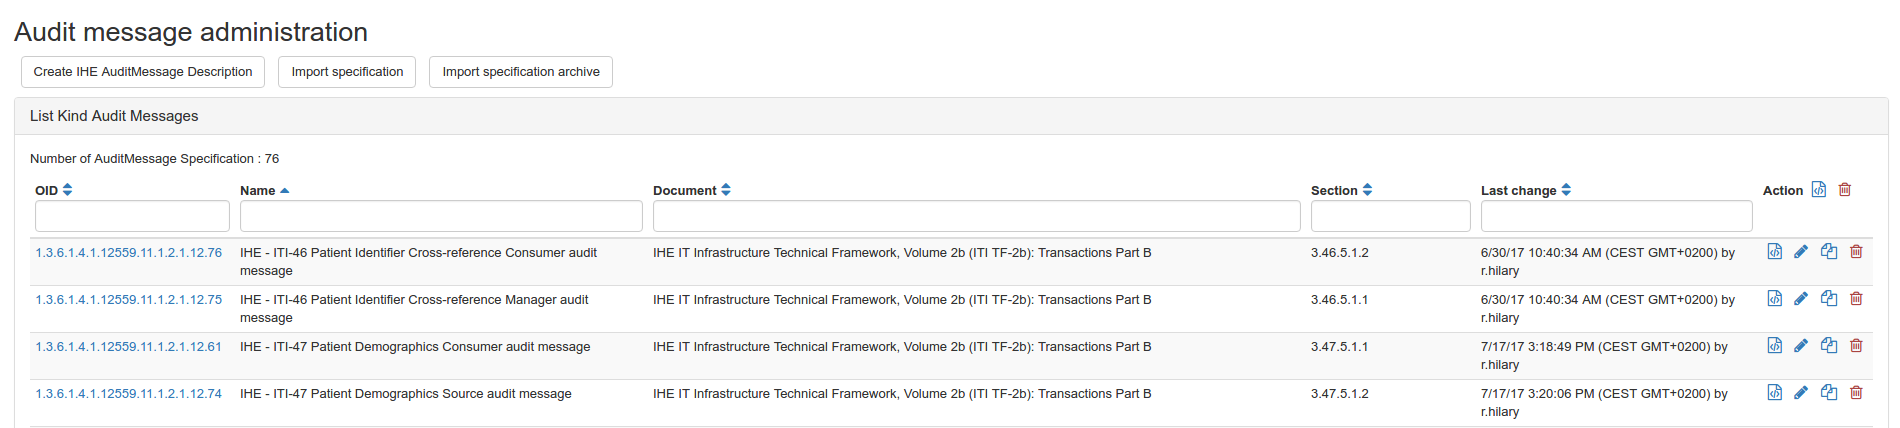
From this page, you can :
- Create Audit message description
- Import specification : one specification or more saved in an archive.
- Edit, duplicate or delete an existing specification
- Export the specification in a XML file
- Export or delete all the specifications by the button next to Action
Create Audit message specification

When you create an Audit message specification, you are asking to select some elements of AuditMessage. Five elements are suggested and those which are required in an Audit message are :
- EventIdentification
- ActiveParticipant : Source
- ActiveParticipant : Destination
- AuditSourceIdentification

When you create an Audit message specification, an unique OID is generated. Then, you have to fill the information about the name, the document reference, the section in the document, the affintiy domain. You have to check the boxes Dicom compatible and Deprecate RFC3881 Validation.
By the button in the right side, you can some ActiveParticipant or some ParticipantObjectIdentification. Some ActiveParticipantand ParticipantObjectIdentification are already predefined in the tool.
Then, you can save and continue to edit this new Audit message specification.
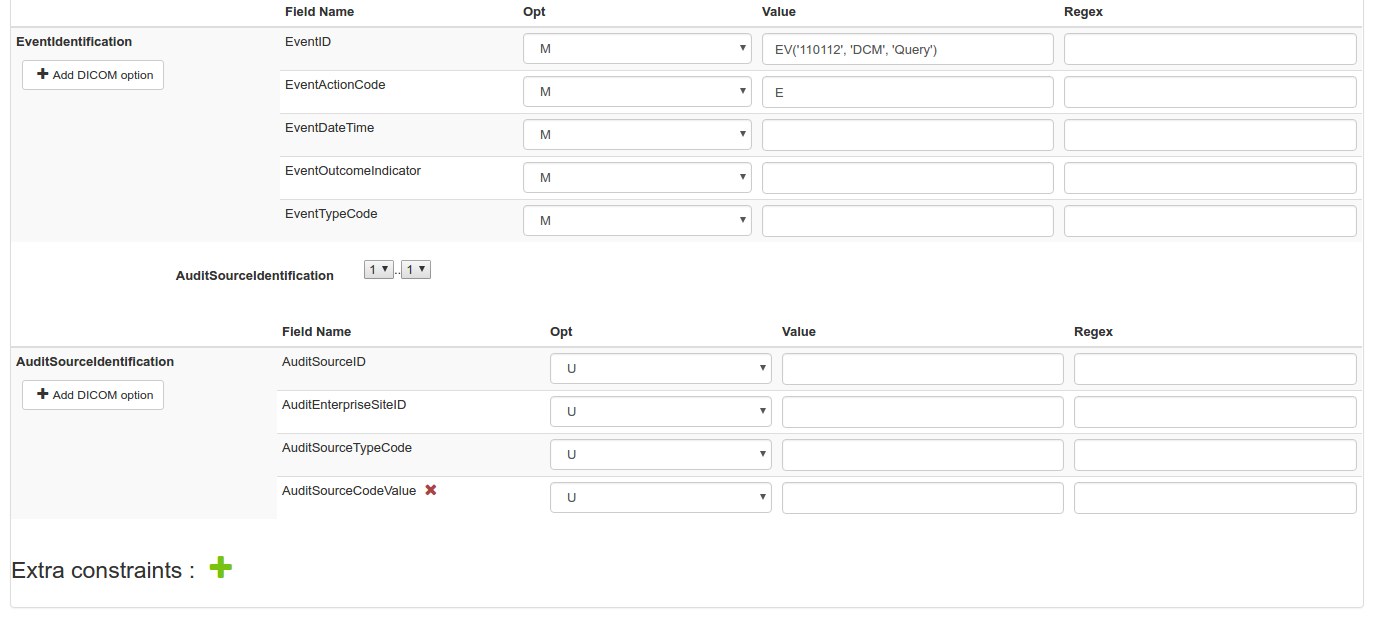
You can add optionality in each element’s attribute. The optionalitycan be M for mandatory, U, C or NA for not applicable. You can also fix the value of the attribute, or use regex to define the expected value of the attribute.
You can change the cardinality of the elements expect for the EventIdentification. There is only one EventIdentification in an Audit message.
Finally, you can also add extra constraints if needed. The severity of an extra constraint can be : error, warning or info.
Specifications created can always be edited.
Syslog Collector
The Syslog Collector is a simulated server used to validate client SYSLOG implementation.
To test your system:
-
go to Audit Trail > Syslog Collector
-
Send a SYSLOG message (Audit Message most of the time) to the defined host and port (UDP or TCP depending on your implementation). The status of the Syslog Collector must be “Running”.
-
Refresh the list of received messages
-
Find your message and verify there is no validation error.
Tips
TLS renegociation
Mostly with IIS servers (Microsoft HTTP server), some resources may be protected. So other a single TLS connection, not authenticated at first, the client request a specific resource (like “GET /secret”). Before responding, server starts a renegotiation of the connection. This was a cause of several security failures, mostly fixed now with TLSv1. The renegotiation asks a certificate to the client for mutual authentication. Even if it is over a single TLS connection, TLS tools record two connections in the logs. The first one is not valid as it is not requesting a certificate, the second one can be valid if it requests for a certificate issued by the CAT certificate authority.
TLS Administration
Simulators
How to create a client
Only one client is needed.
How to create a server
TLS tools must provide one TLS server per protocol. Each server must be started to record connections, on a fixed port accessible from SUTs. TLS server is “dumb” as it can’t provide content to the clients tested. It acts as a proxy to a real server, using an unencrypted connection. For each protocol, an available server must be found. However, it can be simplified as follows :
-
DICOM : OrderManager DICOM server
-
HL7v2 : OrderManager HL7v2 server
-
HTTP, Syslog, Raw : any HTTP server (Gazelle one for simplicity)
How to update server parameters
Once a server it’s created, we can only change its connection parameters (listening port, remote host/port).
XUA X-Service Provider tests
From version 5.5.0, the Gazelle Security Suite tool embeds a feature to test the systems which implement the XUA X-Service Provider actor. This feature is mainly designed to test the behaviour of the system when the wsse:Security header of the received SOAP message contains errors. Most of the errors related to the SAML assertion are already handled by the Gazelle STS tool which is able to issue a large panel of invalid assertions. The purpose of this tool is:
- Having a XUA X-Service User assertion which would be able to send all those assertions for various transactions
- Being able to build more complex SOAP headers including signed timestamp and errorneous SOAP headers.
This feature is available to logged in users under the XUA > X-Service Provider tests menu. The user can browse:
- The test cases
- The test instances
- The ancillary transactions
Test cases
A test cases is made of the following attributes:
- Keyword (may match a test keyword in Gazelle Test Management)
- A description
- An expected result (in its first version, the tool is basic and not automatic validation is performed)
- Information about changes (last modifier, last modified date)
- A list of SOAP header elements
SOAP header elements
A SOAP header parts can be of various types:
- SOAP Header Element defined by a QName (namespace and local name), a value (might be a variable) and a boolean mustUnderstand
- A Timestamp (wsu:Timestamp) : administrator can defined an offset (+/-) for the creation time as well as the duration
- A SAML assertion (Assertions are issued by Gazelle STS, the administrator defines the username and the password to use to contact the assertion provider)
- A Signature (administrator shall define which part of the message is signed and the keystore information to digitally sign this element)
For each SOAP Header Part, a list of ‘Exceptions’ can be added. It will allow the administrator of the tool to introduce errors. Currently the exceptions are of two types:
- Replace: the administrator gives the XPath of the element in the message and a value to put instead of the existing one
- Delete: the administrator gives the XPath of the element to remove from the message before sending it to the system under test
Defining a test case
Currently there is no graphical user interface to create or edit the test cases, everything is done using SQL inserts.
Ancillary transactions
The XUA profile cannot be tested alone since it is a security profile which defines specific content to be put in a SOAP header while performing another IHE transaction. In addition, the XUA profile can be available, in a system under test, on top of several transactions. In order
- to allow the users to test each of the transactions which are secured using XUA
- not to assume which transactions are supported by the systems under test
the tool allows the creation of ancillary transactions. Then, when running a test, the user will select which transaction to be sent to the system under test.
An ancillary transaction is defined using the following attributes:
- A keyword
- A name
- A description
- The SOAP Action to be input in the SOAP Header (replaced \(ACTION\) when the SOAP action header part is defined in the test case)
- An XML file representing the content of the SOAP body to be included in the final SOAP message.
Defining an ancillary transaction
Currently there is no graphical user interface to create or edit the test cases, everything is done using SQL inserts.
Running a test case
From the XUA > X-Service Provider tests > Test cases page, the user can run a new test (green play icon). The screen is shown below.

The summary of the test case is displayed as well as a link to the full definition of the test case. In the configuration panel, the user is asked to enter the URL of the tested endpoint and to select a transaction to send to this system.
Finally, the SOAP message is sent when you click on “Launch test”.
As a result, the user gets a permanent link to the test instance and the content of the full SOAP envelops of the sent and received messages are displayed.
Test instances
For each execution of a test case, the following elements are saved as a test instance:
- execution date and time
- username of the user who executed the test
- the executed test case
- the ancillary transaction which was used
- the status (currently not populated since the automatic validation is not implemented)
- the sent and received SOAP Envelops
XML Signature Validator
From version 5.7.0, the Gazelle Security Suite tool offers a SOAP web service to validate the digital signatures (ds:Signature where ds stands for http://www.w3.org/2000/09/xmldsig#) present in XML documents. This validator uses the ModelBasedValidatorWS API and thus can be called using the same client as the other model-based validation services. Currently a single descriminator is used: IHE.
What does it check ?
The validator first looks for any instance of the ds:Signature element and then validate them one by one. For each signature, the following requirements are checked:
- Wellformeness of the Signature element
- Correctness of the reference
- Correctness of the signature value (currently only works if a X.509 certificate or a public key is provided)
- Validity of the certificate if present (only checks dates)
- Whether the required KeyInfo element is present or not
It also reports:
- Actual declared digest
- Actual computed digest (if it differs from the declared digest)
- Certificate validity dates (NotBefore and NotAfter)
- Certificate’s issuer
- Certificate’s subject
- Canonicalized referenced content