Sharing of data with Test Management and PatientManager Gazelle applications
Order Filler and Order Placer actors needs to be aware of the patient's demographics and encounters. In the radiology and cardiology domains, this functionnality is assumed by the ADT actor with the RAD-1 and RAD-12 transactions. In other domains, the use of PAM (Patient Admission Management) integration profile is recommended and often required. In order to populate the Order Manager with consistent data, we have chosen to put in place a mechanism for sharing patient and encounter data between several applications from the Gazelle testing platform. In case you just need a patient and an encounter but you did not use PAM Simulator or Test Management applications to create it, you can randomly generate one.
Random generation of patient and encounter
For the needs of the OrderManager, a REST web service has been implemented in PAMSimulator application which enables the other applications to get random data for a patient and/or an encounter. As a consequence, if you want to create an order for a new patient or for a new encounter (you already have the patient created in OrderManager) you only have to select the country in the application (or the existing patient), the PAM Simulator will return you a patient and a related encounter or only an encounter.
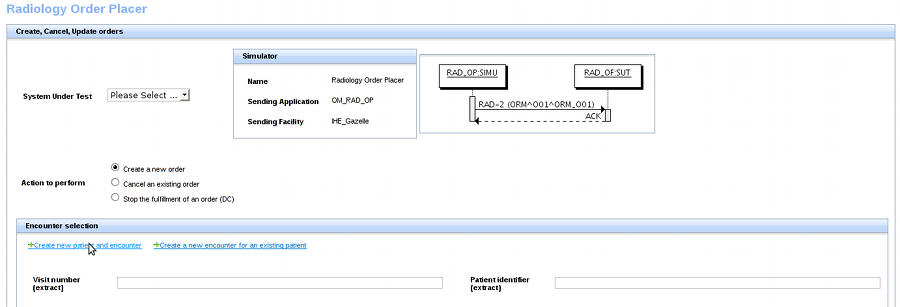
The example below is taken from the page which enables a user to send a new order to his/her Order Filler.
1. Hit the button entitled " Create new patient and encounter" if none of the offered encounters nor patients meet your needs.

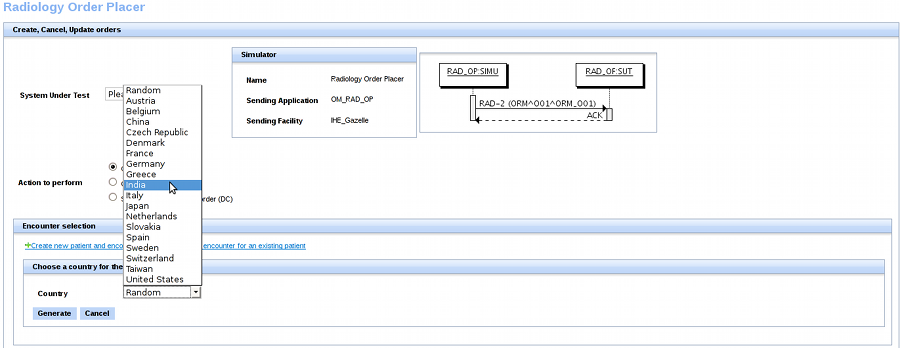
2. You will then have to choose the country of your patient. Here we have chosen India.

3. Finally, the patient and the encounter have been created

If you want to use a patient already registered in the application, use the " Create a new encounter for an existing patient" button, you will be asked to pick up one of the existing patient and an encounter will be automatically, randomly generated.
Import patient from PAM Simulator and Test Management
Both PAM Simulator and Test Management application enable the user to create patients according various criteria. In some tests, you will want to reuse the same patient without losting your time copying each piece of information one by one. In order to save your time during the connectathon or during your testing periods, we have added a feature in those application. You will only have to select the patient you need, hit a button, choose the patient identifier to use for creating the order or the worklist and send the request to the OrderManager.
In PAMSimulator, the button is available for each patient in the All Patients page. In Test Management, go to Connectathon --> Patient Generation and Sharing --> tab "Existing patients".
The screenshots below are taken from Test Management.
1. Select the patient to import in Order Manager. Here we have chosen the first one, Yanira Gregg by hitting the "Create a worklist for this patient" button; the last button of the row, on the right.

2. A pop-up shows up and ask you from which assigning authority you want to use the patient identifier. Select the proper assigning authority and hit the green button.

3. I will then arrive in OrderManager, the patient demographics are filled and an encounter has been created randomly. You then need to tell the application if you want to create an order or a worklist for this patient. If you want to create an order, specified which actor will have to send it (Order Placer or Order Filler). If you choose to create a worklist, specified the integration profile for which you are performing the test. Finally, hit the "create" button.

Note that, if you choose to create a worklist, the order will be filled with random values.
Import encounter from PAM Simulator
If you have created an encounter in the PAM Simulator application, you may want to use it to create an order or an encounter. In this case, choose the encounter you want to import into OrderManager; go to its permanent page and hit the button "Create a worklist or an order for the selected encounter". You will also be asked to select the patient's identifier; then you will reach the page described in point 3.

